Styrofoam Recycling – Smart Business Idea
|
Styrofoam recycling as a business? Warm Heart has developed a simple, replicable system to convert styrofoam into a useful product.
Styrofoam recycling provides an opportunity for both men and women to build a sustainable business while helping clean up our environment. At Warm Heart, we are experimenting with building an office with our styrofoam bricks. It does not take much money to start-up, and the product has many possible uses. Watch our video to see how easy it is, and follow the step by step directions below. |
|
Styrofoam Cement Bricks and Roofs, Machines and Molds
|
Collecting
You can collect styrofoam before it is thrown away or after. The easiest way to collect a lot of styrofoam is to arrange with appliance stores to keep it for you. Appliances from radios to refrigerators are packaged with blocks of styrofoam that go straight to the dump. Stores are happy to let you save them the hassle of disposing of the stuff. You can also find lots of styrofoam litter on the side of the road and in village dumps. If the styrofoam you collect is greasy – for example, old food containers – make a large drum full of soapy water and stir them around in it. Rinse well. |

Warm Heart’s current styrofoam supply – collected in one day from local village dumps
|
|
Grinding
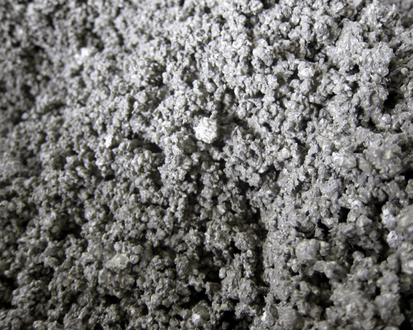
To use styrofoam to make cement products, you must break it down into its smallest “cells.” We call this “fuzz.” It flies everywhere and sticks all over. But if you do not reduce the styrofoam to these small cells – for example, if you tear it into small pieces with your fingers – your bricks will not hold together. |
Failed brick made from hand-torn pieces of styrofoam
|
|
To keep it simple, grind styrofoam to fuzz by scrubbing it with a wire brush. You should do this by holding the styrofoam in a large plastic trash bag and scrubbing the wire brush across its surface. The “fuzz” will collect in the bag.
When we started, we wanted to be super-green, so we made our own, simple grinder using plywood scraps we had lying around and old parts. We powered it with a bicycle and had our kids “ride” the grinder. After a few weeks, however, they rebelled and refused to “ride to nowhere.” Then we added an electric motor, but the grinder was still really inefficient. Finally we broke down and began feeding the Styrofoam to our big biochar grinder. The biochar grinder just eats the foam up! Here’s a picture of P’Sing, one of our biochar staff grinding Styrofoam. The ground foam comes out a bit gray because of the char dust, but that makes no difference. |

P’Sing grinding Styrofoam using Warm Heart Biochar grinder.
|
|
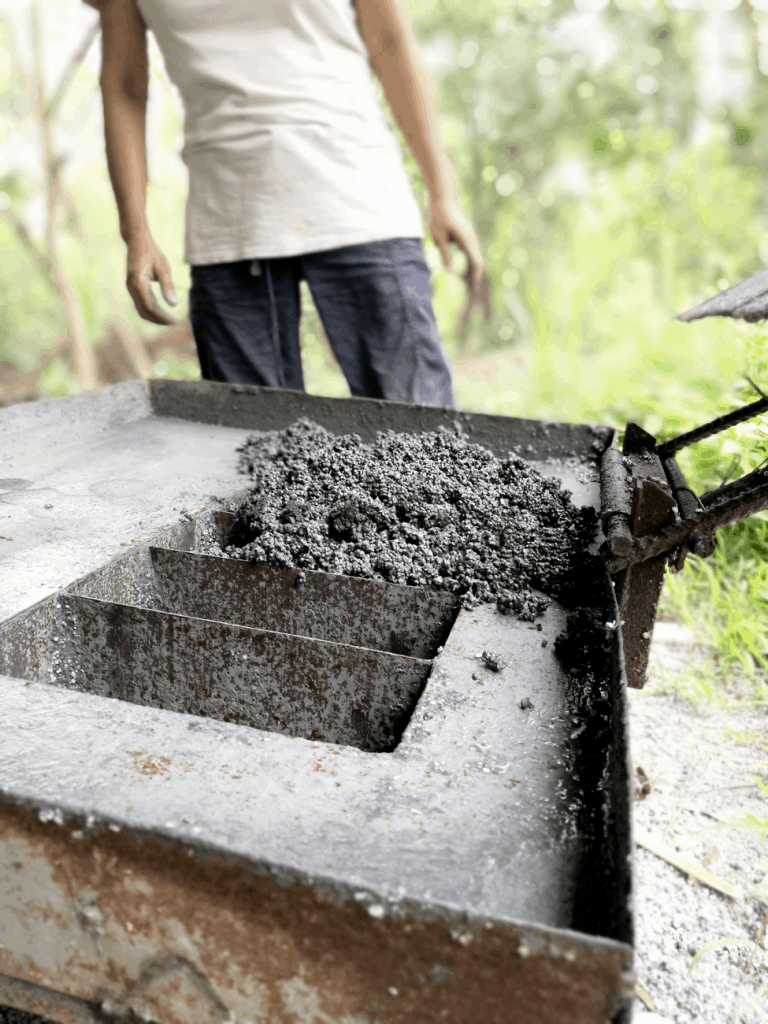
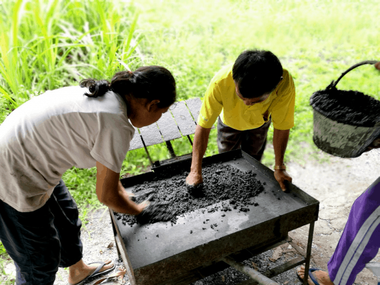
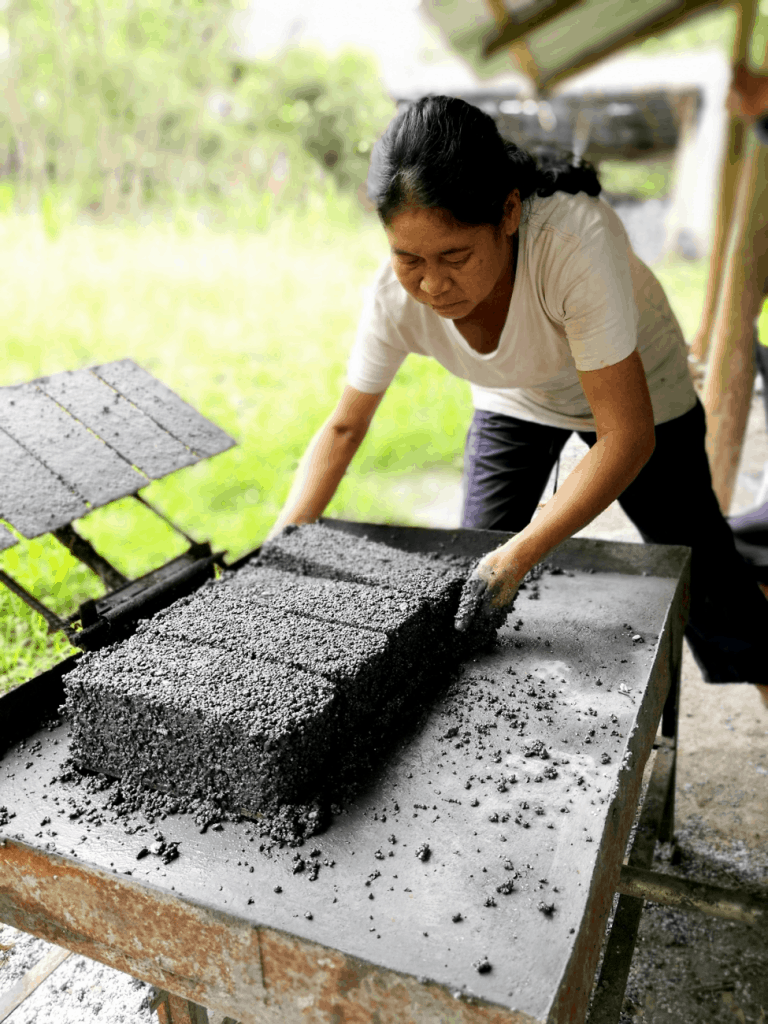
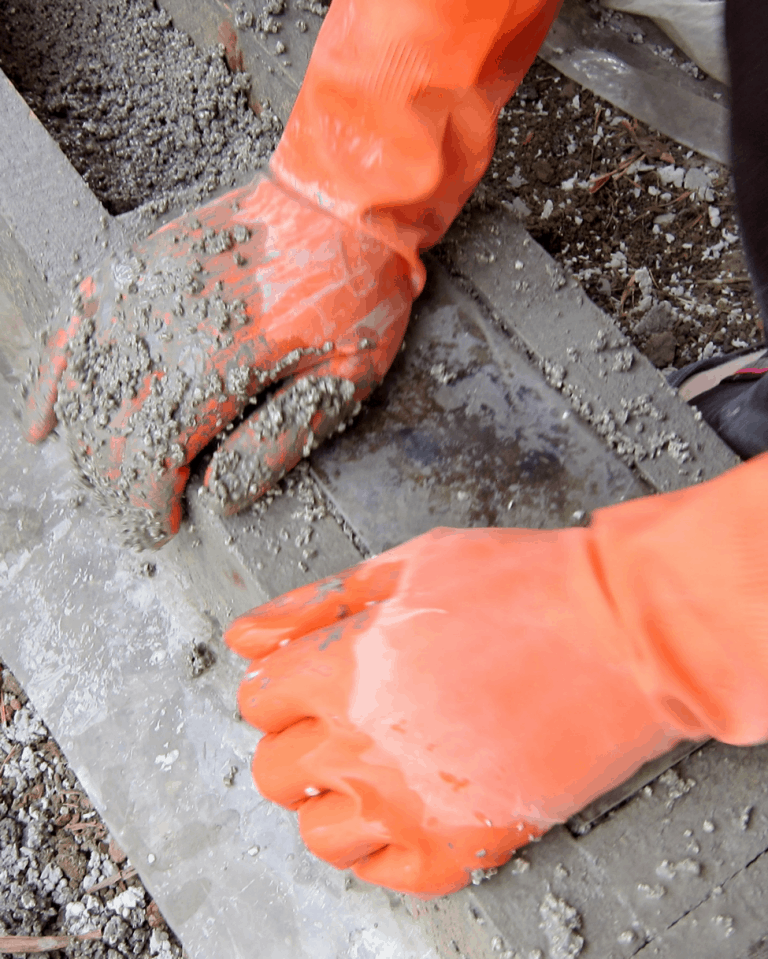
Mixing
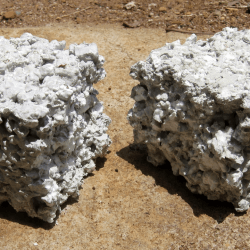
We experimented with many ratios of styrofoam fuzz and cement powder before settling on 5:1. 5:1 bricks use a lot of styrofoam, neither break nor crumble easily, bear a big load, provide good thermal and sound insulation, and are light and inexpensive. Our standards may not be yours, and our standards are not scientific. We cannot test, for example, load-bearing capacity. Where we work, however, contractors use brick as infill between load-bearing columns and do not build load-bearing brick walls. Our brick, therefore, needs only to support its own weight to a height of three meters. We also use foam cement as roof insulation. We pour a thin layer (2 inches/6 cm) on a flat roof to reduce heat gain during the day and cut the cost of cooling. This works really well. Because foam cement is mostly foam, it does not weigh much and does not require additional structural support for the roof. Although a good roof should be domed to drain, we also paint our roofs with water-based urethane topped with a white, exterior paint. If you plan to use styrofoam cement to bear loads – in foundations or walls – you will need to test the structural properties of whatever ratio you select and, indeed, of styrofoam as a cement additive. If you chose to go ahead and use foam cement, it is easy to make and use. You will require (1) lots of styrofoam fuzz, (2) cement powder, (3) water, (4) a large mixing container, (5) a bucket to use as a standard measure, (5) a hoe for mixing and, if you are making bricks, (5) either molds, mold-sized rectangles of wood for packing and flattening cement in the molds, or some kind of brick making machine, and (6) a drying area. If you are planning to make roof tiles, you will need the tile forms. If you are planning to lay a styrofoam cement roof, you need to have prepared the frame to contain the cement at the edges of the roof. |
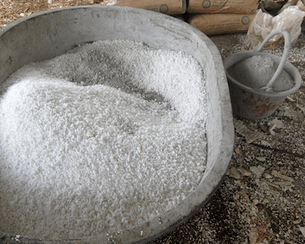
Five buckets of styrofoam fuzz and one bucket of cement powder ready to mix, enough for approximately 22 of our bricks
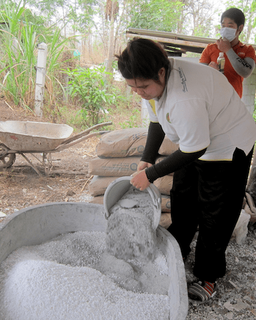
Adding one bucket of cement powder to five buckets of styrofoam fuzz
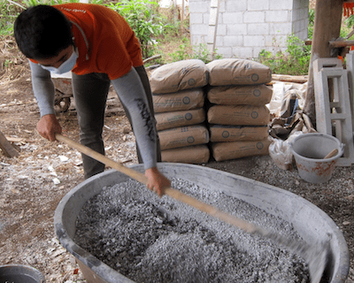
Mixing the styrofoam fuzz and cement powder before adding water

Adding one bucket of water (add more if necessary, but sparingly!)
|
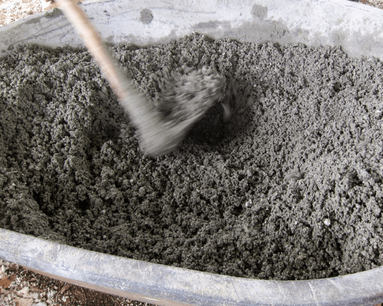
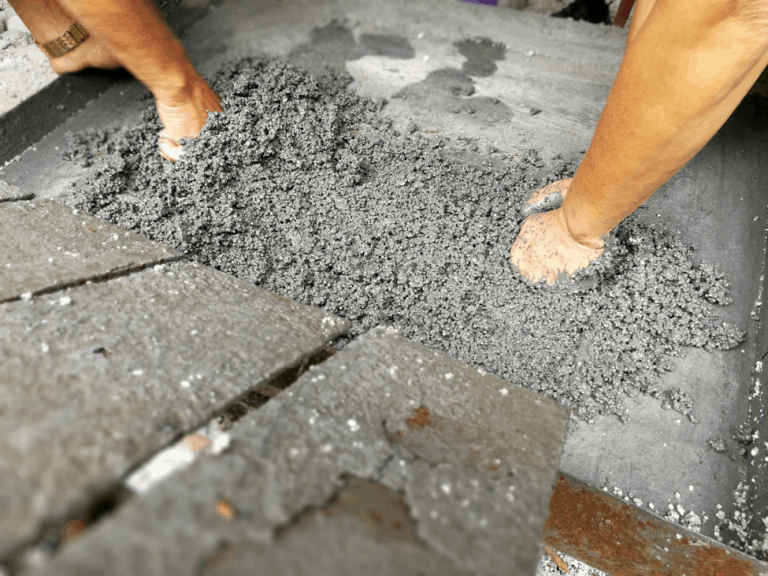
The wet mix
|
The wet mix up close – clumpy, will form loose ball – but if you squeeze it, it will come apart. The Fuzz will compress and then expand againl
|
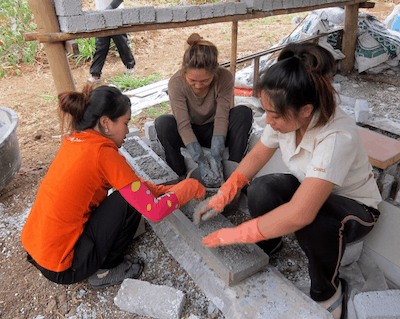
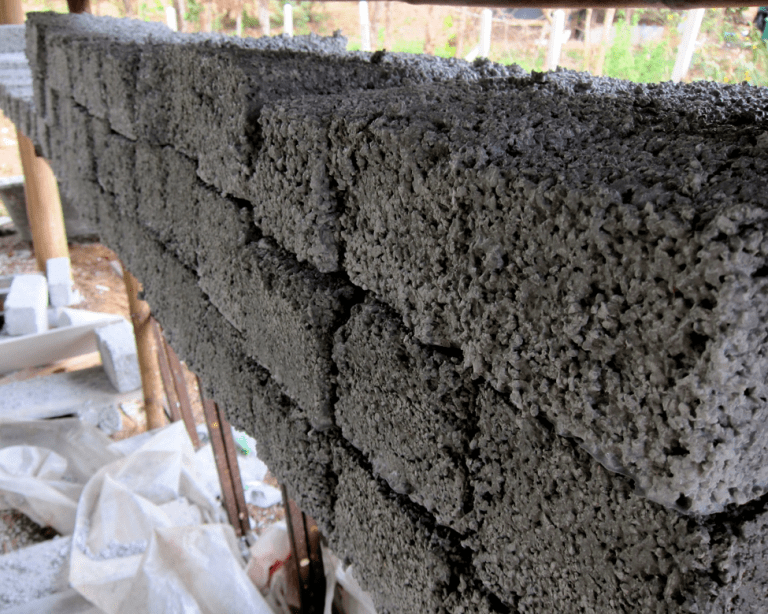
Brick Molds v. Machines – Both Do It Yourself
Bricks are the easiest product to make with styrofoam cement mix. You can make bricks using wooden molds or a simple machine. The molds are easy and inexpensive to make, but are a very slow way to make bricks! (If you are adept, you can make perhaps a few dozen a day.)
If you know a welder and have access to a recycler or a junk yard, making a machine is not terribly difficult and will increase productivity a lot. (Four old men can make 600-700 bricks a day using two, 5-brick machines.)
We strongly suggest that you take the time and make the investment to build a brick-making machine. The increase in labor productivity is huge. Four old men can make enough bricks to build a small house in 10 days!
We apologize for not yet having proper drawing of our machine available. Below, however, you will find many photographs. Please use our contact us form if you have questions or need help. Like all other Warm Heart technology, this brick-making machine is open source. All we ask is that you recognize Warm Heart when you build and use it.
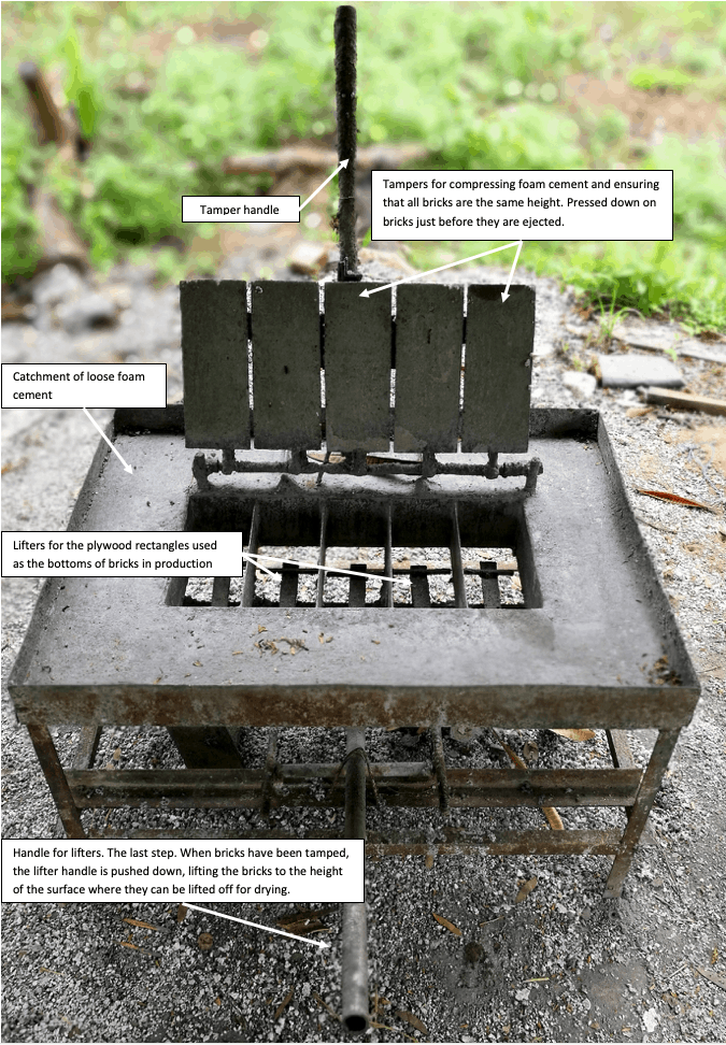
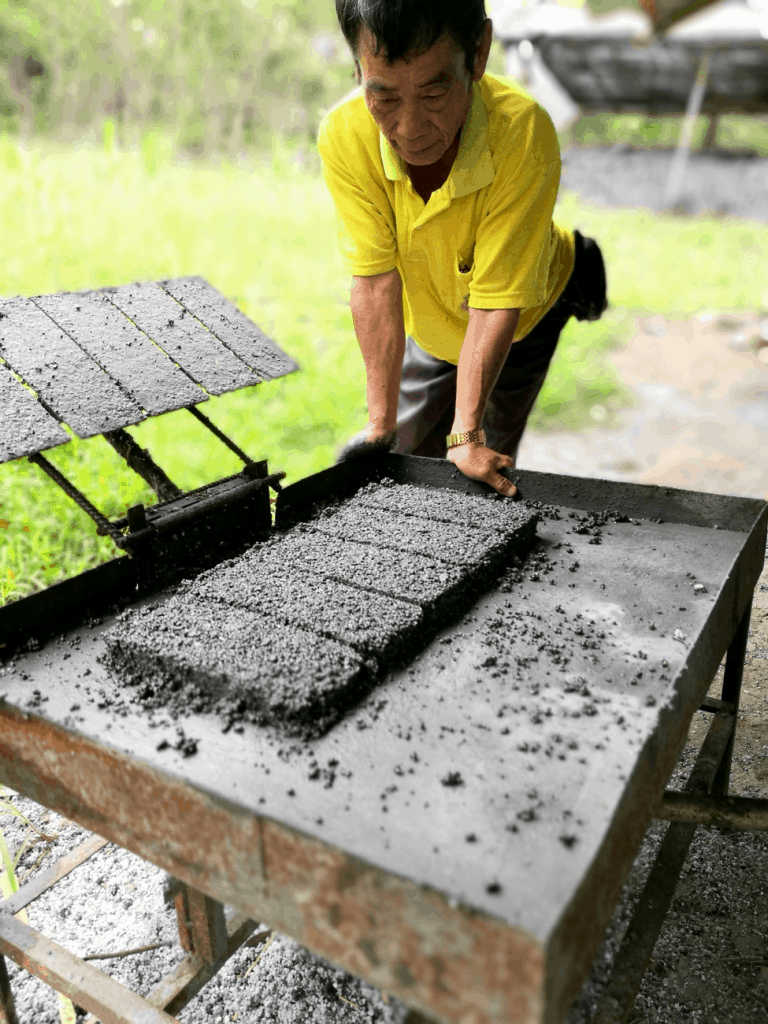
Using the brick-making machine
If you choose to use the brick-making machine, you will need to make sure that you have lots of cement powder, Styrofoam fuzz and drying space ready and waiting.
Remember: when you are done, you must clean all of your equipment completely. If you leave bits of cement to harden, nothing will work next time around.
Start by arranging your materials and tools – cement making tub, measuring buckets, hoe, machines and drying area. Then make cement.
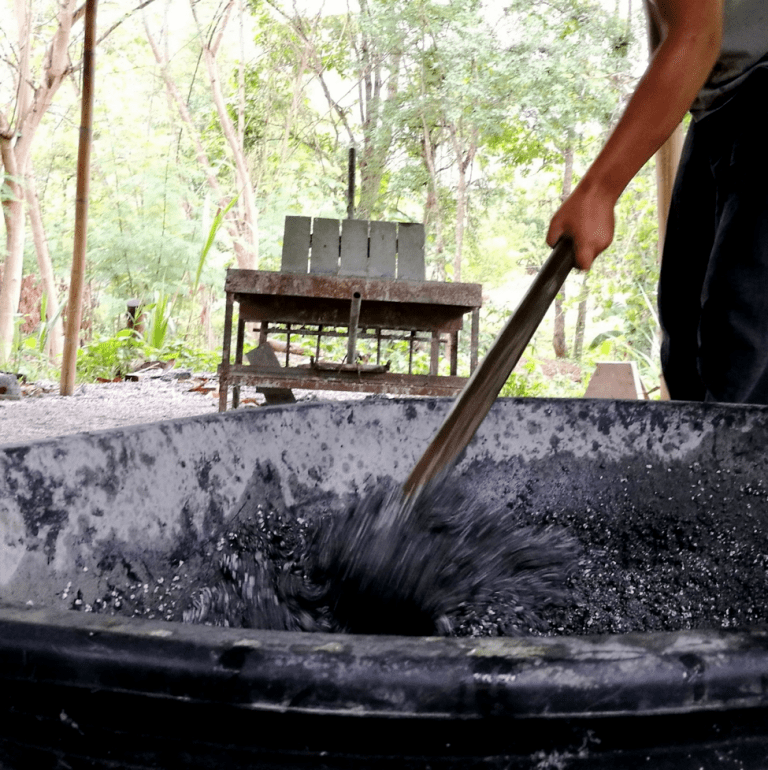
Mixing foam cement with brick making machine in background
|
Loading foam cement onto the brick-making machine
|
Completing the load
|
Pushing foam cement mix into the molds of the brick-making machine
|

Tamping the bricks to compress and ensure that they are all the same height here to edit.
|
Watching the bricks being ejected
|
Lifting a new brick out of the machine to carry to the drying rack. Be very careful. At this point they are super fragile and the corners will crumble easily
|
Drying bricks – with a lot of spilled fuzz (NOT good)
|
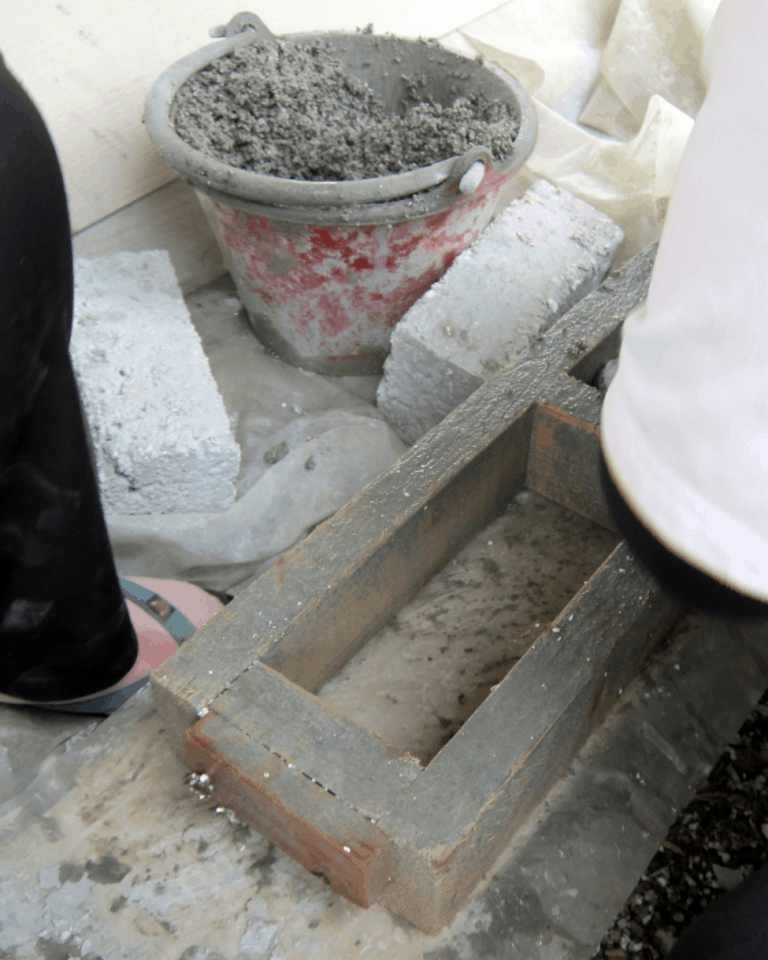
Using molds
If you choose to use molds, remember that you will need to have available at least as many molds as are required to use up a single batch of mix!
Remember! You must wash your molds, cement making tub and implements carefully when you are done. If you allow dried cement to build up, the molds will not work and the tub will flake into your cement mix and spoil the batch.
The easiest molds to make are “ladder” molds for two or three bricks. (Do not go for more. They get unwieldy very fast. Better to have many molds than a few big, awkward molds.) The key thing to remember is that you want all of your bricks to be exactly the same size – and a standard construction size so that anything you might buy – window or doorframes, for example, or columns – match up with them properly.
Unless you are truly experimenting, make good quality molds that will last. Your molds will take a beating; make them out of good, solid wood that is well fastened together.

Simple, two brick “ladder” mold
|
Making bricks with ladder mold
|
Pressing a rectangle of wood into the mold to compress the mix and flatten the top
|
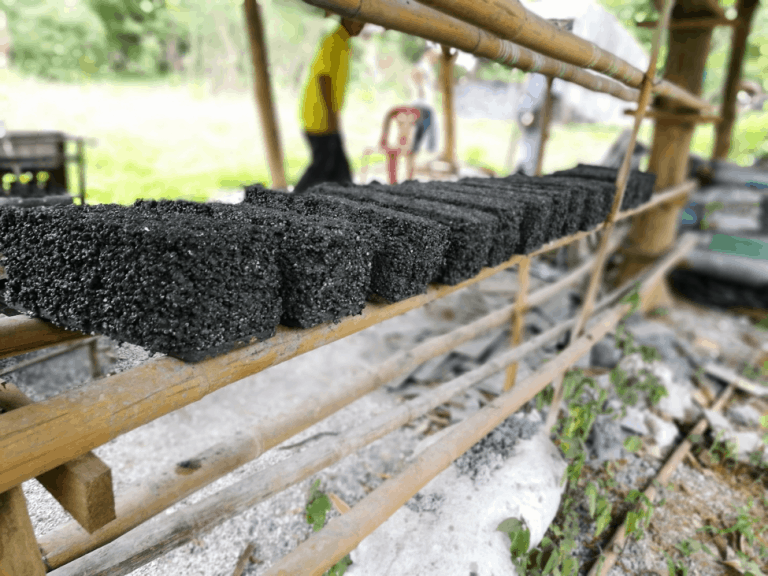
Drying
When you have removed your bricks from the mold, place them to dry in a sunny spot or at least where they will not be subjected to heavy rain in the first day. They are very fragile until they set. Dry for three days before using.
When you have removed your bricks from the mold, place them to dry in a sunny spot or at least where they will not be subjected to heavy rain in the first day. They are very fragile until they set. Dry for three days before using.
Rows of new bricks drying. Even wet they are so light that they sit on just two bamboos.
|
Styrofoam cement roofs
Foam cement bricks provide near complete thermal and sound insulation. Foam cement can also be used to insulate roofs. It is easy to make foam cement “roof tiles” or simply to pour foam cement on top of an existing roof. To make insulating roof tiles for a building with an existing roof, make molds by taking a sheet of the same roofing material as the roof and built a frame around it. The height of the frame will depend on how thick you want the tile to be. Shovel styrofoam cement mix onto the tile form and spread evenly with your hands. Allow to cure for several days. Paint with water-based urethane if possible or otherwise any exterior latex (preferably while to add reflectance). A still easier solution is to lay foam cement directly on top of the existing roof. To do this, first, drill a series of “weep holes” along the lowest edge of the roof. Then install a “frame” around the roof that is as high as you want the insulating layer of foam cement to be. Fill the frame with foam cement to the depth that you desire. When the foam cement has set, paint the roof with water-based urethane and an exterior (white) paint. |

Warm Heart’s tin roofed biochar lab that was once unbearably hot in the sun.
|
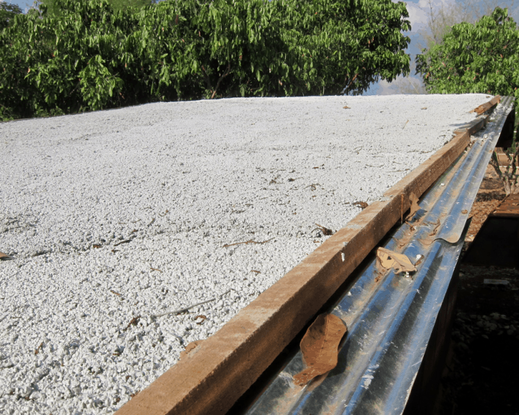
5 cm styrofoam cement roof laid on top of biochar lab tin roof for insulation
|
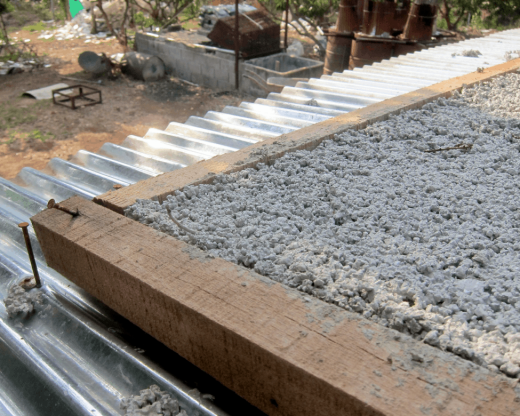
Detail of styrofoam cement roof laid on biochar lab tin roof for insulation
|
|
Styrofoam cement external wall plaster and secondary brick walls
To insulate a house or building against heat or sound, either build a secondary wall of styrofoam cement bricks doubling an external wall that faces the sun or, for example, a busy road. Alternatively, apply styrofoam cement as a thick (5-10 cm) plaster to existing walls to provide heat and sound insulation. Warnings about styrofoam cement products laid to rest There is concern about the flammability of styrofoam and so of styrofoam cement products. These concerns have not been borne out by Warm Heart’s tests. Exposed to open flame, 5:1 styrofoam bricks do not burn readily and do not off-gas rapidly. (See photos below.) We use foam cement to insulate our biochar briquette drying kilns and it is both highly effective as insulation, and does not discolor or burn. This said, for potential fire safety and toxic gas safety, Warm Heart still recommends the following:
|
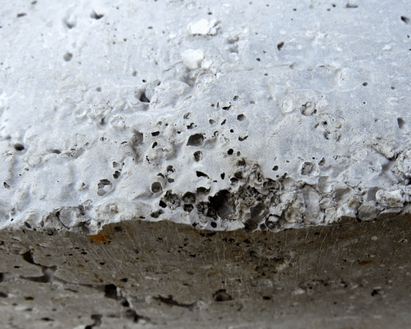
Smooth surface, 5:1 brick after 90 seconds exposure to open flame
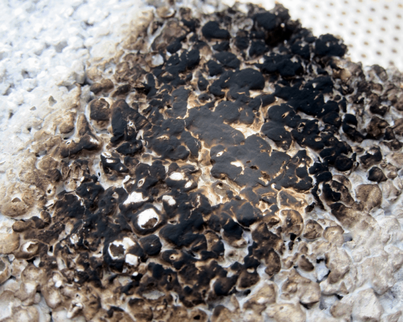
Close up of open surface, 5:1 brick after 120 seconds exposure to open flame
|